
Homemade Dog Treats (Peanut Butter and Pumpkin) Recipe
Every pup deserves a special treat, and what better way to show your furry friend some love than with Homemade Dog Treats (Peanut Butter and Pumpkin)? These delightful bites not only tantalize your dog’s taste buds, but they’re also packed with wholesome ingredients that you can feel good about serving. The rich, creamy peanut butter pairs beautifully with nutrient-dense pumpkin, making these treats both delicious and health-conscious.
One of the best aspects of making your own dog treats is the endless possibilities for customization. Consider adding ingredients like carrots for an extra crunch, or a sprinkle of cinnamon for enhanced flavor. Don’t shy away from experimenting with different shapes and sizes of your treats, whether it’s fun bone shapes or simple round bites.
To achieve peak freshness and flavor, be sure to follow expert tips such as thoroughly mixing your ingredients and baking until golden brown. Your canine companion will be begging for more, and you’ll enjoy the satisfaction of creating a delicious, homemade snack tailored just for them.
Ingredients for Homemade Dog Treats (Peanut Butter and Pumpkin):
Creating nutritious and tasty dog treats at home is a rewarding experience, and this recipe for peanut butter and pumpkin treats is sure to have your furry friends begging for more! Below, you’ll find all the ingredients you need to whip up a batch that serves 8–10 dogs.
Core Ingredients
- 1 cup of natural peanut butter: Make sure it’s free of xylitol, a compound toxic to dogs. Choose unsweetened organic peanut butter for a healthier option.
- 1/2 cup of pure pumpkin puree: This can be canned or homemade; just ensure it’s 100% pure pumpkin with no added sugars or spices. Pumpkin is great for digestion!
- 2 cups of whole wheat flour: If your dog has wheat allergies, substitute with oat flour or almond flour for a gluten-free option.
- 1/2 cup of rolled oats: These add texture and are beneficial for your dog’s digestive health. You can also use ground oats if your dog prefers a smoother treat.
- 1/4 cup of water: This helps to moisten the mixture. Adjust as needed to achieve the desired dough consistency.
- 1 large egg: Fresh and organic if possible, this adds binding properties to your treats.
Optional Additions
- 1/4 cup of shredded carrots: Great for added crunch and sweetness, carrots provide vitamins and minerals.
- 1/4 cup of applesauce: Unsweetened applesauce can add moisture and a hint of flavor. Make sure it contains no added sugars or preservatives.
- 1 teaspoon of cinnamon: This can be a delightful addition, but use sparingly. While safe in small amounts, too much can be unhealthy.
- Anise or parsley: A pinch of ground anise or finely chopped parsley can provide a unique flavor twist while also freshening your dog’s breath!
These ingredients come together to create a wholesome and enjoyable treat that your furry companions will adore. Feel free to mix and match the optional ingredients to tailor the treats to your dog’s tastes!
How to prepare Homemade Dog Treats (Peanut Butter and Pumpkin):
Creating delicious and healthy dog treats at home is simple and rewarding. Follow these clear steps to make your furry friend a tasty snack they will love!
Gather Your Ingredients
Start by collecting the ingredients you need. You will require 1 cup of pumpkin puree, 1/2 cup of natural peanut butter, 2 1/2 cups of whole wheat flour, and one egg.
Preheat the Oven
Set your oven to preheat at 350°F (175°C). This temperature is ideal for baking your treats to a delightful crispness.
Mix Wet Ingredients
In a mixing bowl, combine the pumpkin puree and peanut butter. Use a spatula or whisk to blend them until smooth.
Add the Egg
Crack the egg into the bowl of blended ingredients. Stir well to ensure the egg is evenly integrated into the mixture.
Incorporate the Flour
Gradually add in the whole wheat flour. Begin mixing with a spatula or your hands until the dough starts to form.
Knead the Dough
Transfer the dough onto a floured surface. Knead it gently for about 2-3 minutes until it’s firm and not sticky.
Roll Out the Dough
With a rolling pin, roll out the dough to about 1/4 inch thickness. Ensure it’s evenly spread to guarantee uniform baking.
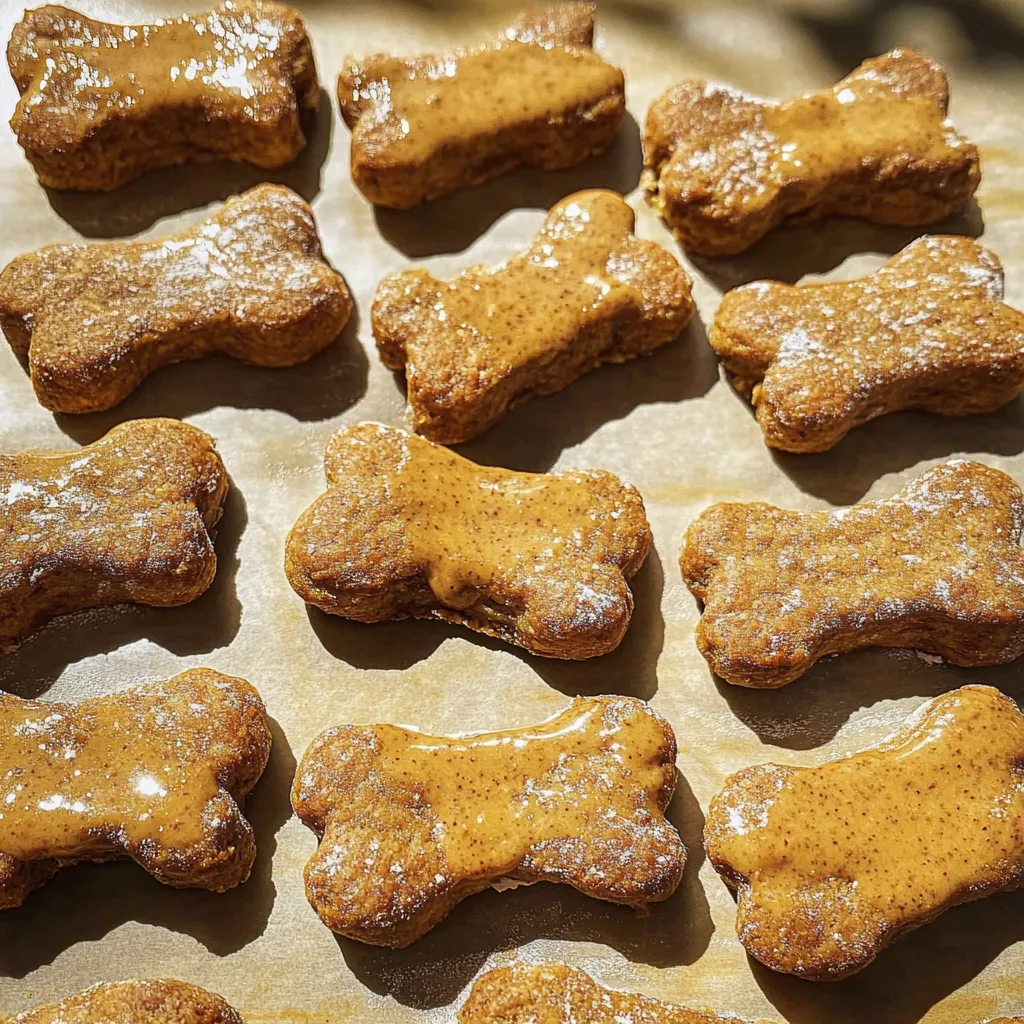
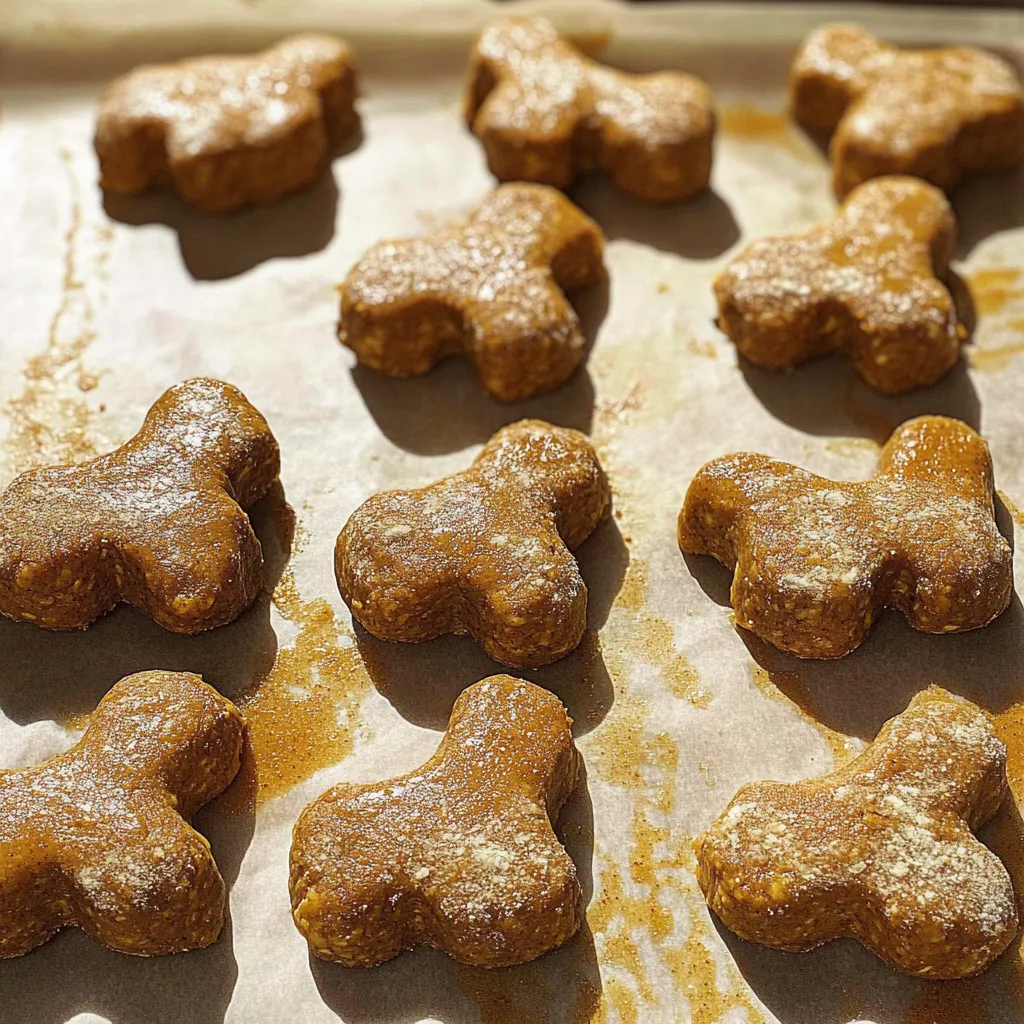
Cut into Shapes
Use cookie cutters to create fun shapes from the rolled dough. Place each cutout on a baking sheet lined with parchment paper.
Baking Time
Put the baking sheet in the preheated oven. Bake the treats for 20-25 minutes, or until they turn golden brown and feel dry to the touch.
Cool Properly
Once baked, remove the treats from the oven. Let them cool on a wire rack for at least 30 minutes before serving.
Storage Tips
Store the cooled treats in an airtight container. They can last for up to a week at room temperature or longer if refrigerated.
By following these straightforward steps, you will create homemade dog treats (peanut butter and pumpkin) that your canine companion will adore!
Tips for the Perfect Homemade Dog Treats (Peanut Butter and Pumpkin)
Making delightful homemade dog treats involves careful attention to detail. Follow these tips to ensure your furry friend enjoys every bite.
Maintain the Correct Temperature
When baking, it’s crucial to keep your oven temperature accurate. Preheat your oven to 350°F (175°C) for optimal results. Too high a temperature can lead to treats that are overly crunchy or burnt, while too low can result in a doughy texture. Always use an oven thermometer to confirm that your oven is heating correctly. After baking, allow the treats to cool completely on a wire rack. This helps them firm up, making them easier to store.
Quality Ingredients Matter
Using high-quality ingredients enhances the flavor and health benefits of your treats. Opt for natural peanut butter that does not contain added sugars, salt, or xylitol, as the latter is toxic to dogs. For pumpkin, use pure canned pumpkin, not pumpkin pie filling, which contains spices and sugars unsuitable for pets. Aim for organic options when available, so you can offer your dog treats without unnecessary additives.
Substitutions for Dietary Restrictions
Dogs can have various dietary restrictions, so it’s good to have some substitutions in mind. For those with gluten sensitivities, swap regular flour with oat flour or almond flour. If your dog has allergies to peanut butter, consider using sunflower seed butter as a safe alternative. Additionally, you can modify the recipe by incorporating other dog-safe fruits and vegetables like mashed bananas or grated carrots. Simply follow the same measurements as the pumpkin for consistency.
Storage Tips
Homemade dog treats should be stored properly to maintain their freshness. Place the cooled treats in an airtight container and keep them at room temperature for up to a week. For longer storage, freeze them for up to 3 months. Just ensure to thaw only the number you need before serving. This practice prevents spoilage and ensures your dog gets fresh treats every time!
Experiment with Flavors
Adjusting flavors can keep treat time exciting for your pet. Mix in some cinnamon or ginger for added flavor, but do this in moderation. Consider adding oats for texture or even a bit of honey for a touch of sweetness. Remember, whatever you add should be safe for dogs. Variety keeps your furry friend interested and happy!
Storage Tips for Homemade Dog Treats (Peanut Butter and Pumpkin):
Storing your homemade dog treats properly ensures they remain fresh and safe for your furry friend. Follow these tips to maintain the quality and flavor of your peanut butter and pumpkin treats.
Optimal Storage Conditions
Choose a cool, dry place for storage. Avoid exposing treats to direct sunlight or heat sources like stoves and ovens. Both factors can lead to spoilage. An airtight container works best; it will protect against moisture and air that can degrade the treats. You can use glass jars, plastic containers, or resealable bags. Always make sure your container seals tightly.
Refrigeration for Freshness
For prolonged freshness, consider refrigerating your treats. Store them in an airtight container to prevent them from absorbing any odors from the fridge. Refrigeration extends the shelf life significantly, making it suitable for treats that you plan to use over an extended period. Aim to consume refrigerated treats within a week or two for optimal taste and safety.
Freezing for Longevity
If you have made a large batch, freezing is an excellent option. Wrap individual treats in plastic wrap and place them in a freezer-safe container or bag. Label the container with the date. Frozen treats can last up to six months. When you are ready to serve, simply thaw a treat in the fridge or at room temperature. Avoid microwaving them, as this can cause uneven heating.
Checking for Freshness
Before giving your pup a treat from storage, check for visible signs of spoilage. Look for mold or an unusual smell. If you notice anything off, it’s best to discard the treat to ensure your dog’s health and safety. Regularly check your stored treats and rotate them to use the older ones first.
Adjusting to Seasonal Changes
Seasonal humidity can affect treat storage. In humid summer months, airtight containers become even more crucial to prevent moisture from spoiling the treats. In contrast, colder, drier months may allow for simpler storage methods. Pay attention to your local climate and adjust your storage practices accordingly.
By following these storage tips, you can ensure that your homemade dog treats stay fresh, delicious, and ready for your furry friend to enjoy any time.
Related Recipes
If you enjoy making homemade dog treats, you might also like these complementary recipes. They share similar ingredients or cater to your pet’s taste preferences.
- Sweet Potato Dog Biscuits: These treats are packed with nutrients and flavor. Sweet potatoes are easy on your dog’s stomach and contain vitamins. Like the peanut butter and pumpkin treats, these biscuits are simple to make and can be cut into fun shapes to entice your pup.
- Chicken and Rice Dog Treats: Combining chicken and rice creates a wholesome snack. This recipe is a great alternative for dogs with sensitive stomachs. The savory flavor can balance the sweetness of the peanut butter and pumpkin, providing variety in your dog’s diet.
- Carrot and Oat Dog Cookies: Carrots are not only crunchy, but they also support dental health. Mixed with oats, these cookies offer a healthy bite alongside the peanut butter and pumpkin treats. Both recipes use natural ingredients, making them safe and wholesome.
- Apple and Cheddar Dog Muffins: If your dog enjoys fruit, these muffins might be a hit. The combination of apple and cheddar introduces new flavors while maintaining a focus on healthy, homemade ingredients. They can serve as a delightful contrast to the flavors found in peanut butter and pumpkin snacks.
These recipes not only provide variety but also ensure that your pet enjoys a balanced diet using ingredients you trust. Rotate these treats to keep snack time exciting for your furry friend!
Frequently Asked Questions:
What are the benefits of making homemade dog treats?
Creating your own dog treats allows you to control the ingredients your pet consumes, ensuring they are healthy and free from artificial additives. By using wholesome, natural components like peanut butter and pumpkin, you can create nutritious snacks that cater to your dog’s dietary needs. Homemade options can help avoid allergens and food sensitivities, promoting better health and wellness for your furry friend.
Can I use any type of peanut butter in these treats?
While preparing your homemade treats, it’s essential to choose a peanut butter that doesn’t contain xylitol, an artificial sweetener toxic to dogs. Opt for natural peanut butter with minimal ingredients, ideally just peanuts and salt. This will keep your dog safe while still delivering the rich flavor that makes peanut butter treats so appealing to them.
How long do homemade dog treats last?
The shelf life of homemade dog treats can vary based on the ingredients and preservation method used. Generally, these peanut butter and pumpkin goodies can last up to two weeks when stored in an airtight container at room temperature. For extended freshness, consider refrigerating or even freezing them, which can allow you to prepare larger batches that last for months.
Can I substitute pumpkin with other ingredients?
Absolutely! If pumpkin isn’t available or your dog has a preference for other flavors, you can substitute it with ingredients like sweet potato or pureed carrots. However, keep in mind that each alternative will impart different flavors and textures, so experiment a bit to find what your dog enjoys best!
Are these dog treats suitable for puppies?
Yes, homemade dog treats made from peanut butter and pumpkin can typically be suitable for puppies, provided they do not have any specific allergies or health issues. It’s wise to consult with your veterinarian before introducing new treats to your puppy’s diet, ensuring they align with their nutritional needs and developmental stage.
How should I serve these treats to my dog?
Serving your homemade dog treats can be a fun and engaging process! You can offer them as a reward during training sessions, use them as a special snack, or even incorporate them into your dog’s meal routine. Just remember to adjust their regular food intake accordingly, as treats should make up a small portion of their overall diet.
Conclusion:
Making homemade dog treats (peanut butter and pumpkin) is a delightful way to show your furry friend some love while ensuring they enjoy healthy snacks. This recipe stands out for its simplicity, requiring minimal ingredients that are typically found in your kitchen. You can easily customize it by adding ingredients like oats or cinnamon to suit your dog’s taste or dietary needs. Flexibility is key—feel free to adjust the consistency of the dough to make different shapes or sizes of treats, catering to your pup’s preferences. By baking these treats, you save money and control the quality of what goes into your dog’s diet, strengthening your bond with every tasty bite. Start creating these wholesome delights today, and watch your dog’s tail wag with joy!