
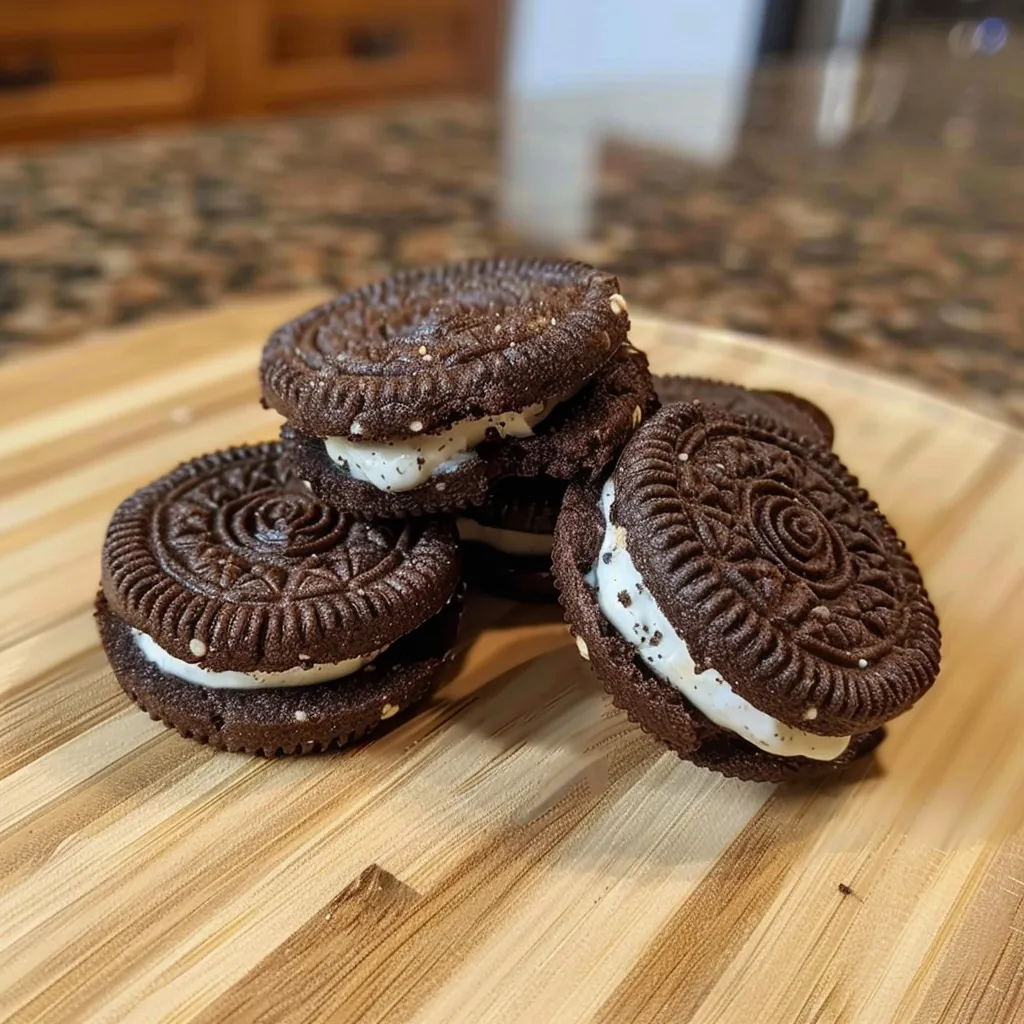
How to Make Delicious Oreo-Inspired Dog Treats Quickly
Have you ever wondered if your furry friend could enjoy a treat inspired by the classic Oreo cookie? You’re in for a delightful surprise! How to Make Delicious Oreo-Inspired Dog Treats is the perfect way to indulge your pup while keeping their taste buds engaged. Made with wholesome ingredients, these treats are not only pet-friendly but also a wonderful way to bond with your four-legged companion.
Consider getting creative with your treats! Experiment with variations like adding peanut butter for a nutty twist, or incorporating pumpkin puree for an added health boost. You can even mix in shredded coconut or carob chips to make them even more enticing.
To achieve the best results, remember to watch your baking time closely—overbaking can lead to a tough texture. So, roll up your sleeves and get ready to whip up some tail-wagging goodness! Your dog will thank you for the special homemade reward.
Ingredients for How to Make Delicious Oreo-Inspired Dog Treats:
To create scrumptious Oreo-inspired dog treats that your furry friend will adore, gather the following ingredients. This recipe yields about 8-10 servings, perfect for sharing with your beloved pooch!
Base Ingredients:
- 1 cup whole wheat flour – This will serve as the primary base for your treats, providing a nutritious foundation.
- 1/2 cup rolled oats – Oats add texture and are great for digestion, making them a healthy choice for your dog.
- 1/4 cup unsweetened cocoa powder – Ensure it’s specifically meant for dogs; this ingredient mimics the chocolatey essence of Oreos without any harmful substances.
- 1/4 cup unsweetened peanut butter – A favorite among dogs, peanut butter adds flavor and moisture to the treats. Make sure it’s free from xylitol, which is toxic to dogs.
- 1/2 cup chicken or beef broth – Use low-sodium broth for an additional layer of flavor, keeping your treats savory and appealing to your canine companion.
- 1 tablespoon honey – This natural sweetener provides a hint of sweetness while being safe for dogs in moderation.
Binding and Texture Enhancer:
- 1 large egg – The egg acts as a binding agent, helping all the ingredients come together seamlessly while boosting protein content.
Optional Add-Ins for Extra Flavor:
- 1/4 cup shredded carob chips – An excellent alternative to chocolate, carob provides a similar taste and is safe for dogs.
- 1 teaspoon vanilla extract – While this isn’t necessary, adding a splash of vanilla can enhance the aroma and make the treats even more delightful for both dogs and owners.
Storage Recommendations:
After baking your Oreo-inspired treats, store them in an airtight container. They can be kept at room temperature for up to a week or can be refrigerated for longer freshness, with a shelf life of about two weeks.
Feel free to experiment with variations, such as adding pumpkin puree for a seasonal twist or substituting almond flour for whole wheat flour if your dog has specific dietary needs!

How to prepare How to Make Delicious Oreo-Inspired Dog Treats:
Creating tasty Oreo-inspired dog treats is straightforward. This recipe ensures your furry friend can enjoy a delightful snack that resembles their favorite cookie. Follow the steps below for best results.
Gather Ingredients and Tools
Start by collecting all necessary ingredients and tools. You will need whole wheat flour, oats, peanut butter, pumpkin puree, and carob powder. Don’t forget cookie cutters, a mixing bowl, and a baking sheet.
Preheat Your Oven
Set your oven to 350°F (175°C). This heating ensures the treats will bake evenly and achieve the necessary crunch.
Mix Base Ingredients
In a large mixing bowl, combine 1 cup of whole wheat flour and 1 cup of oats. Stir the dry ingredients together to avoid clumps.
Add Wet Ingredients
Next, add 1/2 cup of peanut butter and 1/2 cup of pumpkin puree to the bowl. Mix thoroughly until the mixture is well blended and sticky.
Incorporate Carob Powder
Now, add 1/4 cup of carob powder to the mixture. This will give your treats a lovely chocolate-like flavor that is safe for dogs.
Knead the Dough
After all ingredients are combined, knead the dough with your hands. Ensure the consistency is firm but pliable. If it’s too sticky, add a bit more flour. If it’s too dry, a small splash of water can help.
Roll Out the Dough
On a floured surface, roll out the dough to about 1/4 inch thickness. This thickness ensures that the treats will bake evenly.
Cut the Treats
Use cookie cutters to create shapes from the rolled dough. Choose fun designs that your dog will recognize, like bones or circles.
Bake the Treats
Place the cut-out shapes on a baking sheet lined with parchment paper. Bake them in the preheated oven for about 25-30 minutes, or until they are firm and slightly golden.
Cool and Store
Once baked, allow the treats to cool completely on a wire rack. After cooling, store them in an airtight container. This will keep your Oreo-inspired dog treats fresh for about two weeks.
Now, your pet can indulge in a safe and delicious snack that mimics the iconic Oreo! Enjoy crafting these special treats for your furry friend.
Tips for the Perfect How to Make Delicious Oreo-Inspired Dog Treats
Maintain the Right Temperature
Temperature plays a crucial role in achieving the perfect texture for your dog treats. Always preheat your oven to the specified temperature before baking. This ensures even cooking and helps the treats achieve a nice crunch, similar to traditional Oreo cookies. If your oven tends to run hot or cold, consider using an oven thermometer to dial in the accuracy. For best results, allow the treats to fully cool before storing them to prevent moisture buildup.
Use Quality Ingredients
Utilizing high-quality ingredients significantly impacts the overall flavor and health benefits of your dog treats. Choose whole grain flours and natural peanut butter without added sugar or xylitol, which is toxic to dogs. For the cocoa powder, ensure it is dog-safe. You can find specially formulated carob powder that is safe for dogs and mimics the taste of chocolate. The better the ingredients, the better the treats for your furry friend!
Substitutions for Dietary Restrictions
If your dog has dietary restrictions, you can easily make substitutions while making these delicious treats. For a gluten-free version, replace regular flour with almond or coconut flour. If your dog is lactose intolerant, consider using dairy-free yogurt for the cream filling. Always consult with your vet if you’re unsure about any ingredient in relation to your dog’s health.
Customize Flavor Profiles
Feel free to experiment with flavor variations to keep treat time exciting. Add mashed bananas or pumpkin puree to the dough for added nutrition and flavor. You can also incorporate spices like cinnamon, which is safe for dogs and can enhance the taste. Remember to keep any added ingredients dog-friendly.
Proper Storage Techniques
Store your Oreo-inspired treats in an airtight container to keep them fresh. If you plan to make a larger batch, consider freezing some treats. They can be stored in the freezer for up to three months. When ready to use, simply take out the desired number and let them thaw at room temperature.
With these practical tips, you will create irresistible Oreo-inspired dog treats that your pup will adore! Enjoy baking and sharing your creations!
Storage Tips for How to Make Delicious Oreo-Inspired Dog Treats:
Storing your homemade Oreo-inspired dog treats properly ensures they remain delicious and fresh for your furry friends. Here’s how to maintain their quality and extend their shelf life.
Cool Before Storing
Always allow the treats to cool completely before placing them in storage. If you store warm treats, moisture will accumulate and affect their texture. Cooling helps maintain the crunchy texture that dogs love.
Use Airtight Containers
Choose airtight containers to keep your treats fresh. Glass jars or plastic containers work well. Ensure the lid seals tightly to block out air and humidity. This will help prevent spoilage and keep them tasting fresh for longer.
Refrigeration for Longer Shelf Life
If you plan to keep the treats for more than a week, consider refrigerating them. Place the airtight container in the fridge to extend the shelf life to about two weeks. Always seal the container properly to avoid any absorption of odors from other foods.
Freezing for Extended Storage
If you want to keep your Oreo-inspired dog treats for an extended period, freezing is the best option. Wrap each treat individually in plastic wrap, then place them in a freezer-safe container or bag. This technique minimizes freezer burn and maintains flavor. Frozen treats can last up to three months in the freezer.
Thawing Treats Safely
When you’re ready to serve the treats, thaw them in the refrigerator overnight. Avoid thawing them at room temperature as this can lead to moisture buildup and spoilage. Once thawed, enjoy the treats within a week if stored in the refrigerator.
Check for Freshness Regularly
Inspect stored treats regularly. Look for signs of spoilage, such as an off smell or changes in texture. If you notice any unusual changes, it’s best to discard the treats to keep your pet safe and healthy.
Following these storage tips will help ensure that your homemade Oreo-inspired dog treats stay as delightful as the day you made them, offering a tasty reward for your furry companions.
Related Recipes for Your Furry Friend
If you enjoyed making Oreo-Inspired Dog Treats, consider trying these related recipes. Each recipe shares a theme of dog-friendly ingredients and delicious flavors that your pet will love.
- Peanut Butter Dog BiscuitsPeanut butter is a favorite among dogs. These biscuits combine peanut butter with oats and flour, creating a crunchy treat. Just like Oreo-inspired treats, these biscuits offer a rich flavor that pups adore, making snack time delightful.
- Pumpkin Dog CookiesPumpkin is not only tasty for dogs but also packed with nutrients. This recipe blends pumpkin puree with whole wheat flour and cinnamon. Similar to Oreo treats, these cookies are easy to make and can be shaped into fun designs, perfect for celebrating special occasions.
- Sweet Potato ChewsSweet potato chews serve as a healthy alternative to traditional treats. They are simple to prepare; you just slice and bake sweet potatoes. This recipe complements Oreo-inspired dog treats by providing a chewy texture, which many dogs enjoy. Plus, they are packed with vitamins!
All these recipes share a commitment to using safe, wholesome ingredients for your furry companions. They keep your dog happy and healthy, ensuring that treat time is both nutritious and enjoyable.
Frequently Asked Questions:
What ingredients do I need to create Oreo-inspired dog treats?
To craft delightful Oreo-inspired dog treats, you will primarily need whole wheat flour, unsweetened cocoa powder, peanut butter, and a dog-safe sweetener like honey or maple syrup. Additionally, having vegetable oil or coconut oil can enhance the texture. It’s vital to ensure that the cocoa used is suitable for dogs, so opt for a carob alternative if you’re unsure.
Are these dog treats safe for all dogs?
Generally, Oreo-inspired dog treats can be safe for many dogs, but it is essential to consider any specific dietary restrictions, allergies, or health conditions your canine may have. For instance, some dogs may have sensitivities to wheat or certain ingredients, so consulting your veterinarian before introducing new snacks is always a wise approach.
How should I store the homemade dog treats?
After you make the Oreo-inspired dog treats, store them in an airtight container to maintain their freshness. Depending on the ingredients used, these treats can often last for up to a week at room temperature. If you want the treats to last longer, consider freezing them; they generally keep well in the freezer for up to three months.
Can I freeze the cookie dough for later use?
Absolutely! If you prefer to prepare the dough in advance, you can shape it into balls or discs and freeze them. Once frozen, store the dough in a sealed bag or container. When you’re ready to bake, simply take out the desired quantity and let it thaw slightly before baking for perfectly soft and chewy treats.
How long do these dog treats take to bake?
The baking time for your Oreo-inspired dog treats typically ranges between 15 to 20 minutes, depending on the thickness and size of the cookies. It’s best to observe them closely as they bake, as you’ll want the edges to set while keeping them soft in the middle for that yummy texture.
Can I customize the recipe for my dog’s preferences?
Certainly! One of the joys of making these Oreo-inspired dog treats is the flexibility to customize them. You can swap out certain ingredients, like using different nut butters or adding flavors such as oats or pumpkin puree, to suit your dog’s unique tastes. Just ensure that all alternatives are safe for canine consumption.
Conclusion:
In this guide on how to make delicious Oreo-inspired dog treats, we’ve unlocked a world of flavor and fun for your furry friends. The simplicity of the recipe ensures that you can whip up a batch in no time, while its flexible nature allows for various ingredient swaps based on your dog’s preferences. Consider customizing these treats by adding peanut butter, carob, or even pumpkin puree for a twist. Remember to choose dog-safe ingredients and adjust the texture based on your pup’s chewing habits. Whether you’re celebrating a special occasion or just want to show your love, these homemade treats are sure to delight. Embrace the joy of cooking for your pets, and don’t hesitate to experiment to find the ultimate flavor combination that suits their taste buds!